Intro
The Ademco/Honeywell Vista 40 is a security system that was popular in the 1990s, and there was one installed in my house when I moved in. I was happy with the system, except for one thing – it was phone based and its only means of communication with the outside world was to use an integrated modem to dial via landline into a monitoring center that no longer existed. Not exactly high-tech. I wanted it to be IOT-enabled and send alerts to my phone, and not require a landline. This involved building some circuitry, writing some code, and setting up an NGINX server running a .NET Core WebApi. It was a bit of research, work, and trial-and-error. So why not share this with the world – or with other people who might want to do the same thing but don’t want to go thru the R&D that I had to. (And are too cheap to buy a modern system). Here goes…
Teaser Pics
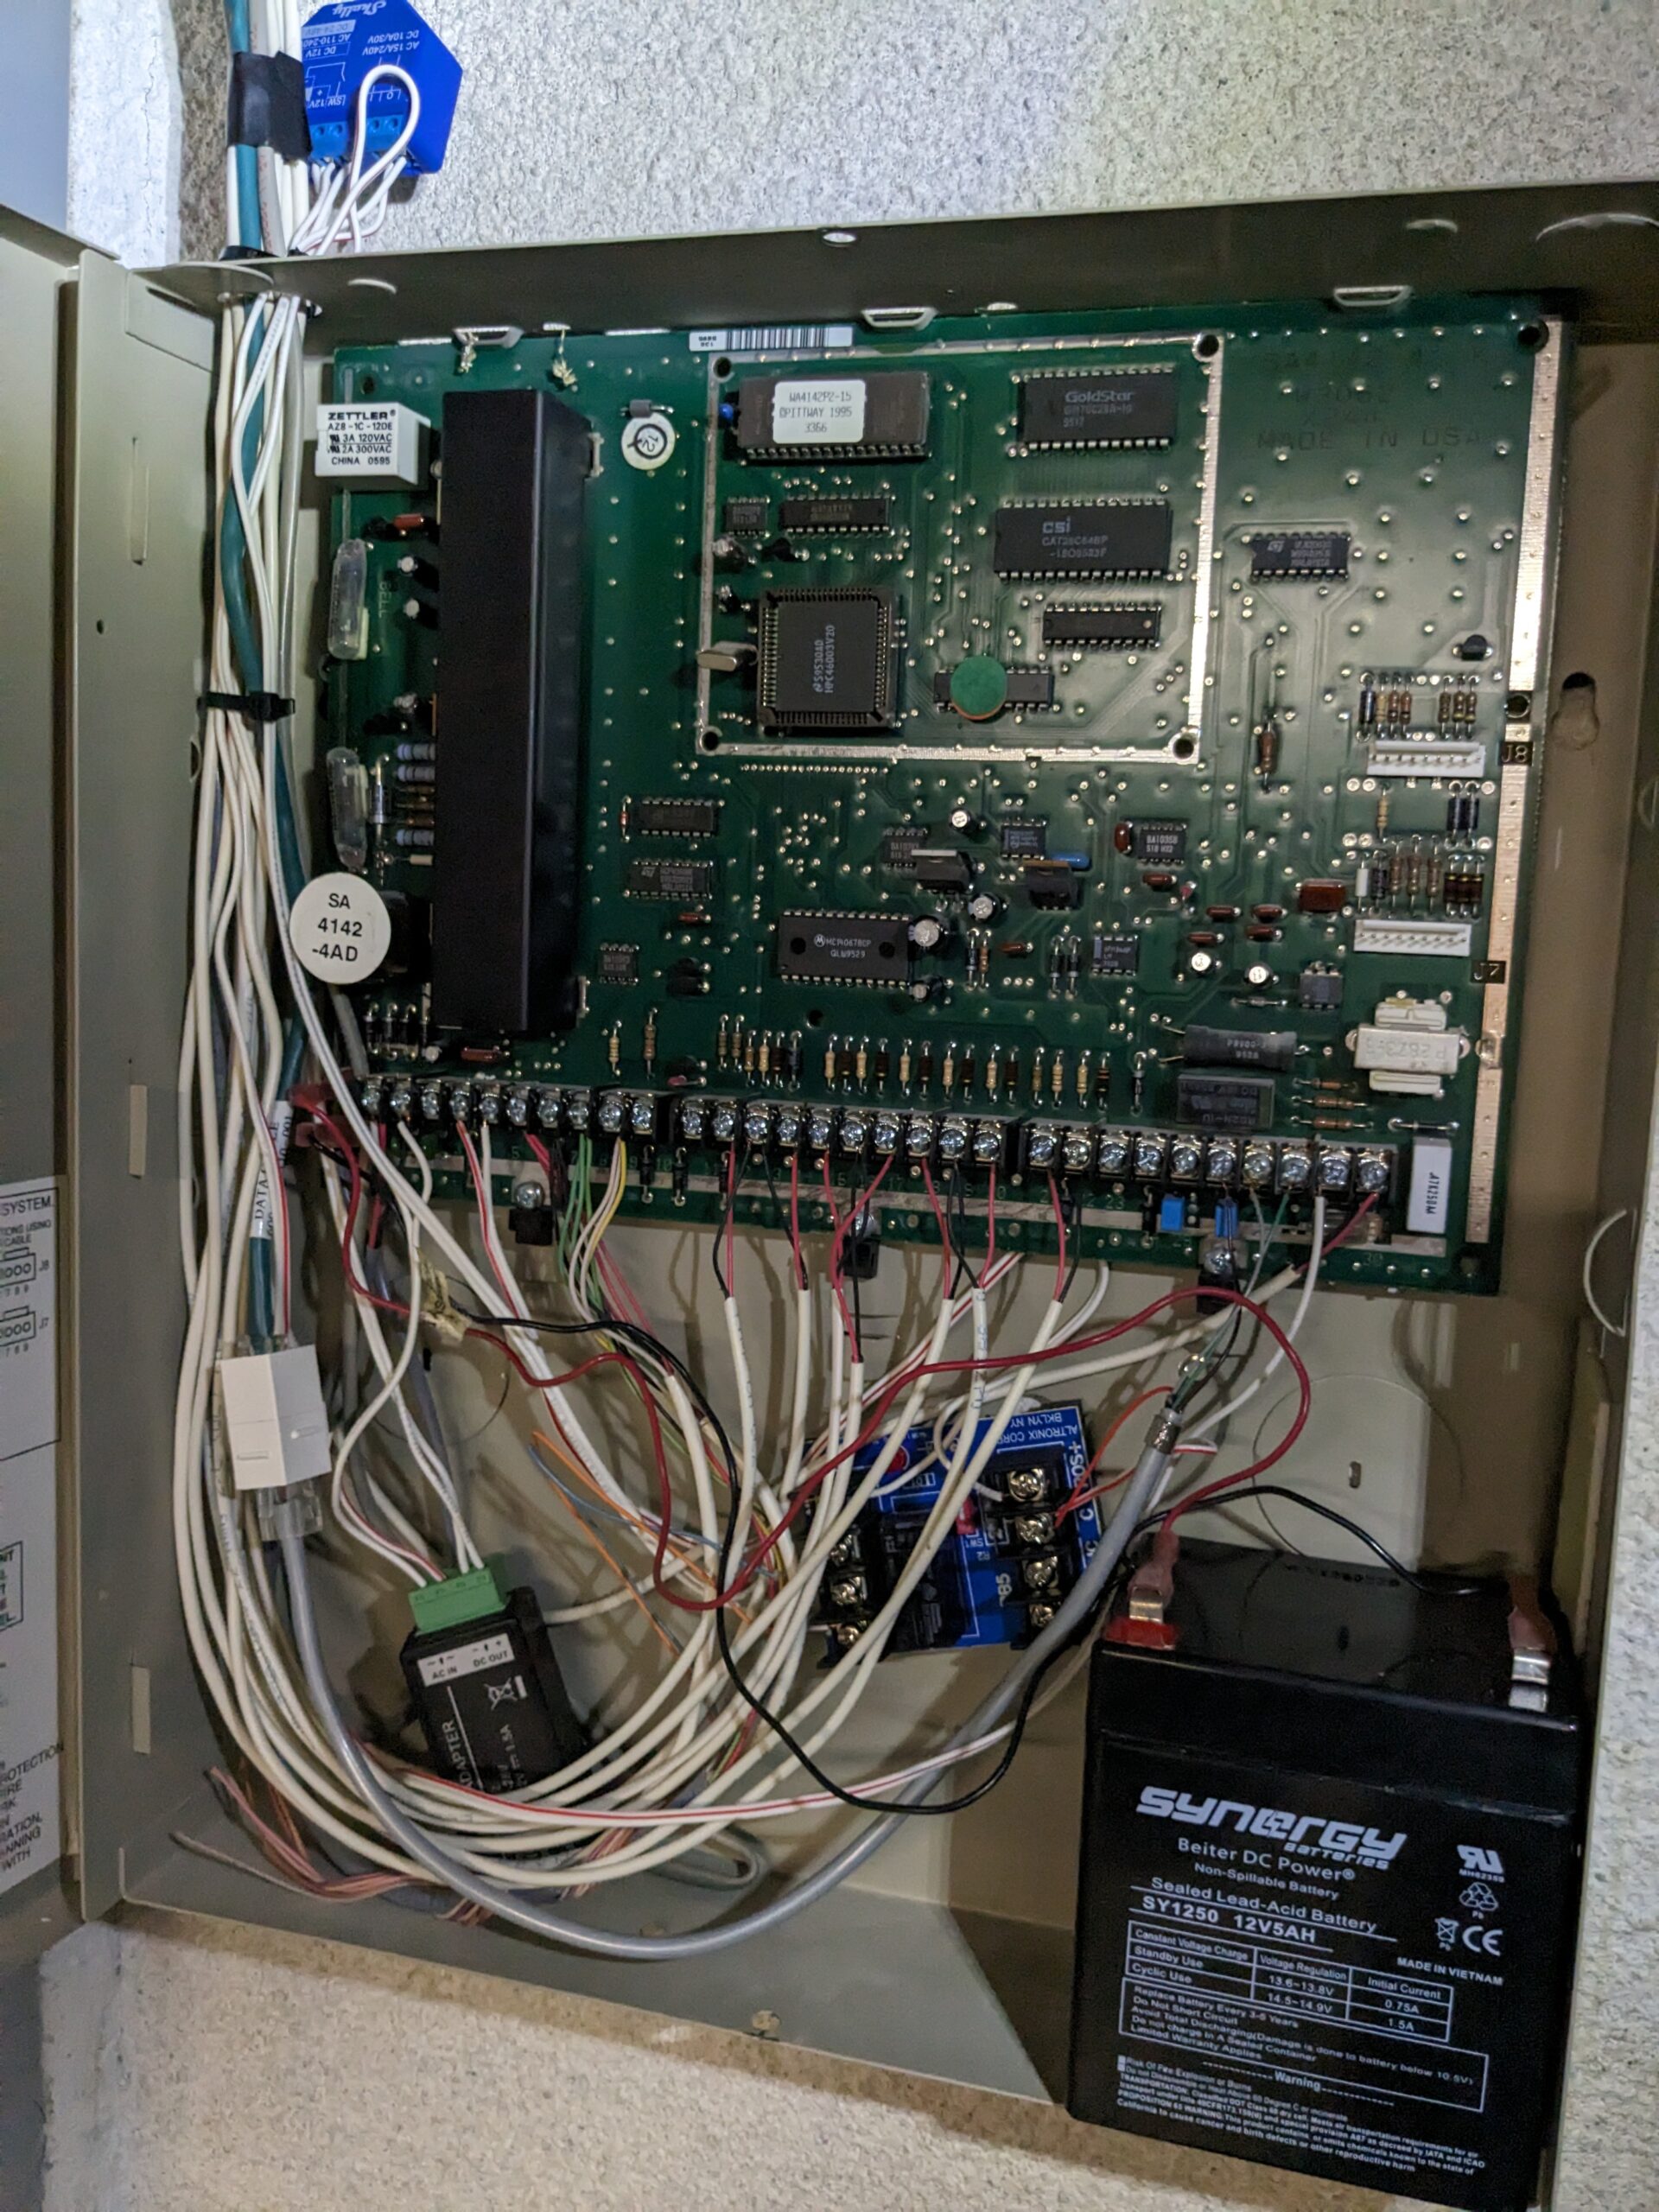
Modified Vista 40 system with WIFI IO relay, RB5 relay, and voltage regulator and rectifier
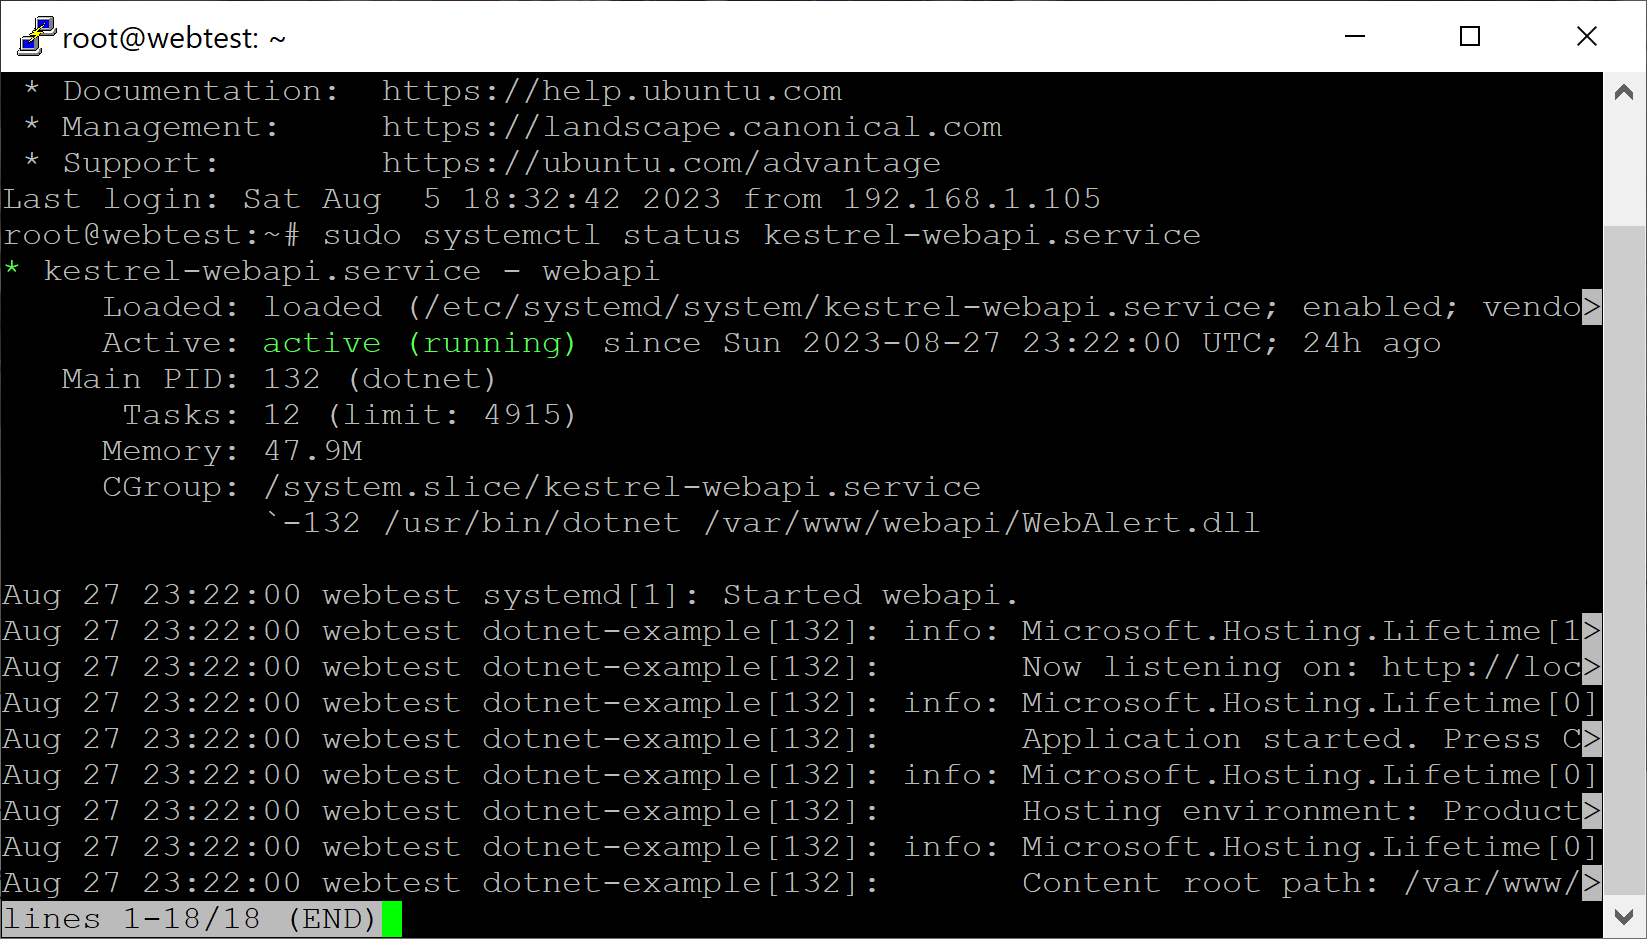
Web API running behind NGINX on an Ubuntu server container on Proxmox
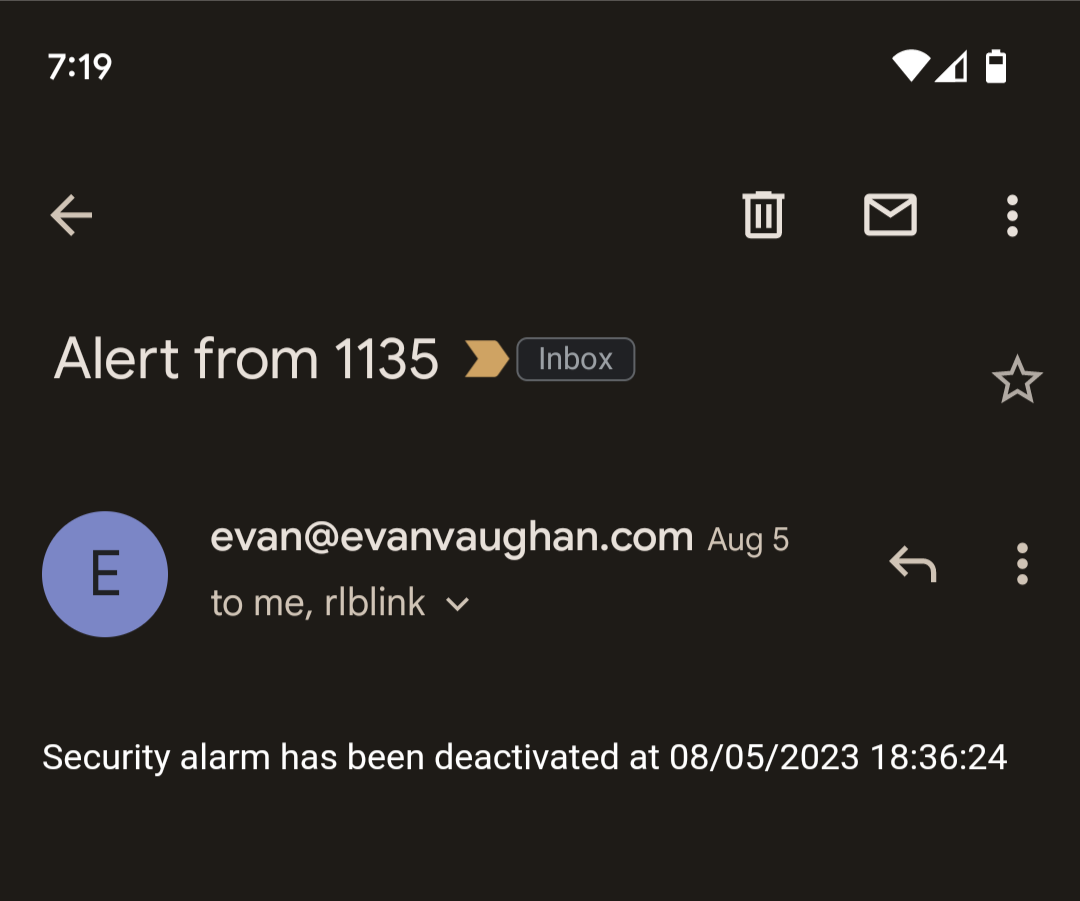
Example of an alert received from the system
High Level
We’ll install a relay (RB5) on the siren output on the Ademco motherboard. When the alarm is triggered, the siren output will be activated and the relay will trigger, activating an input on a Shelly WIFI IO device. The Shelly, upon detecting this, will call an API endpoint that will send an email alert stating the alarm has been triggered. That endpoint will also return a command to the Shelly that prevents the security system from trying to dial out. Finally, the Shelly will monitor the input state, and if the alarm is deactivated it will make another API call to send a deactivation alert. We’ll also connect a dial tone generator to the system to make it think it’s connected to a phone line. This is needed to prevent a “No Line” error on the keypads.
BTW – All of this could be further built out to add much more WIFI monitoring and control to the system. It would also be easy to wire things up to an SMS gateway and receive texts rather than email alerts. But let’s focus on the basics.
What You Need
Altronix Relay Module RB5 (DPDT)
BeElion 24V AC to 12V DC Adapter
Shelly Plus 1 WIFI IO relay
ATA device, dial tone generator, or landline
Small server that can host a .NET core API (cloud instance is fine too)
SMTP gateway
Installing Circuitry
Shut down the system – unplug the 24v power supply and disconnect the 12v backup battery. The WIFI relay will need to be mounted outside of any metal enclosure, else it won’t receive a signal. Make sure the RB5 dipswitch is set to off (1) position for 12v operation.
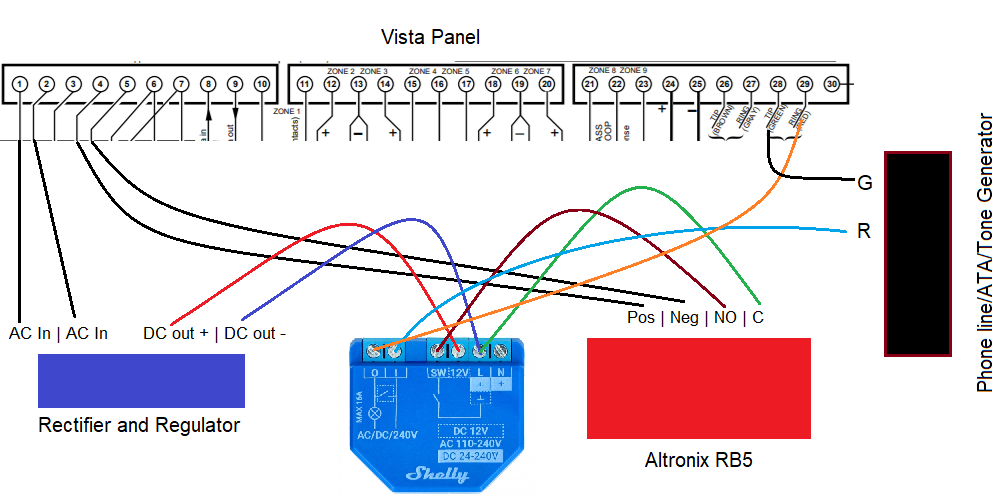
Wiring and component diagram
Setting up the IO Relay
Follow the device instructions to get the Shelly relay up and running and added to your network. Once that’s done you’ll want to set the device to detached input mode. Next, set up the activated and deactivated events, and the respective endpoints that will be called when these trigger. In the example below I’m showing how the activate event is configured. The URL will obviously be unique to your own setup. These endpoints don’t exist yet – we’ll build them next.
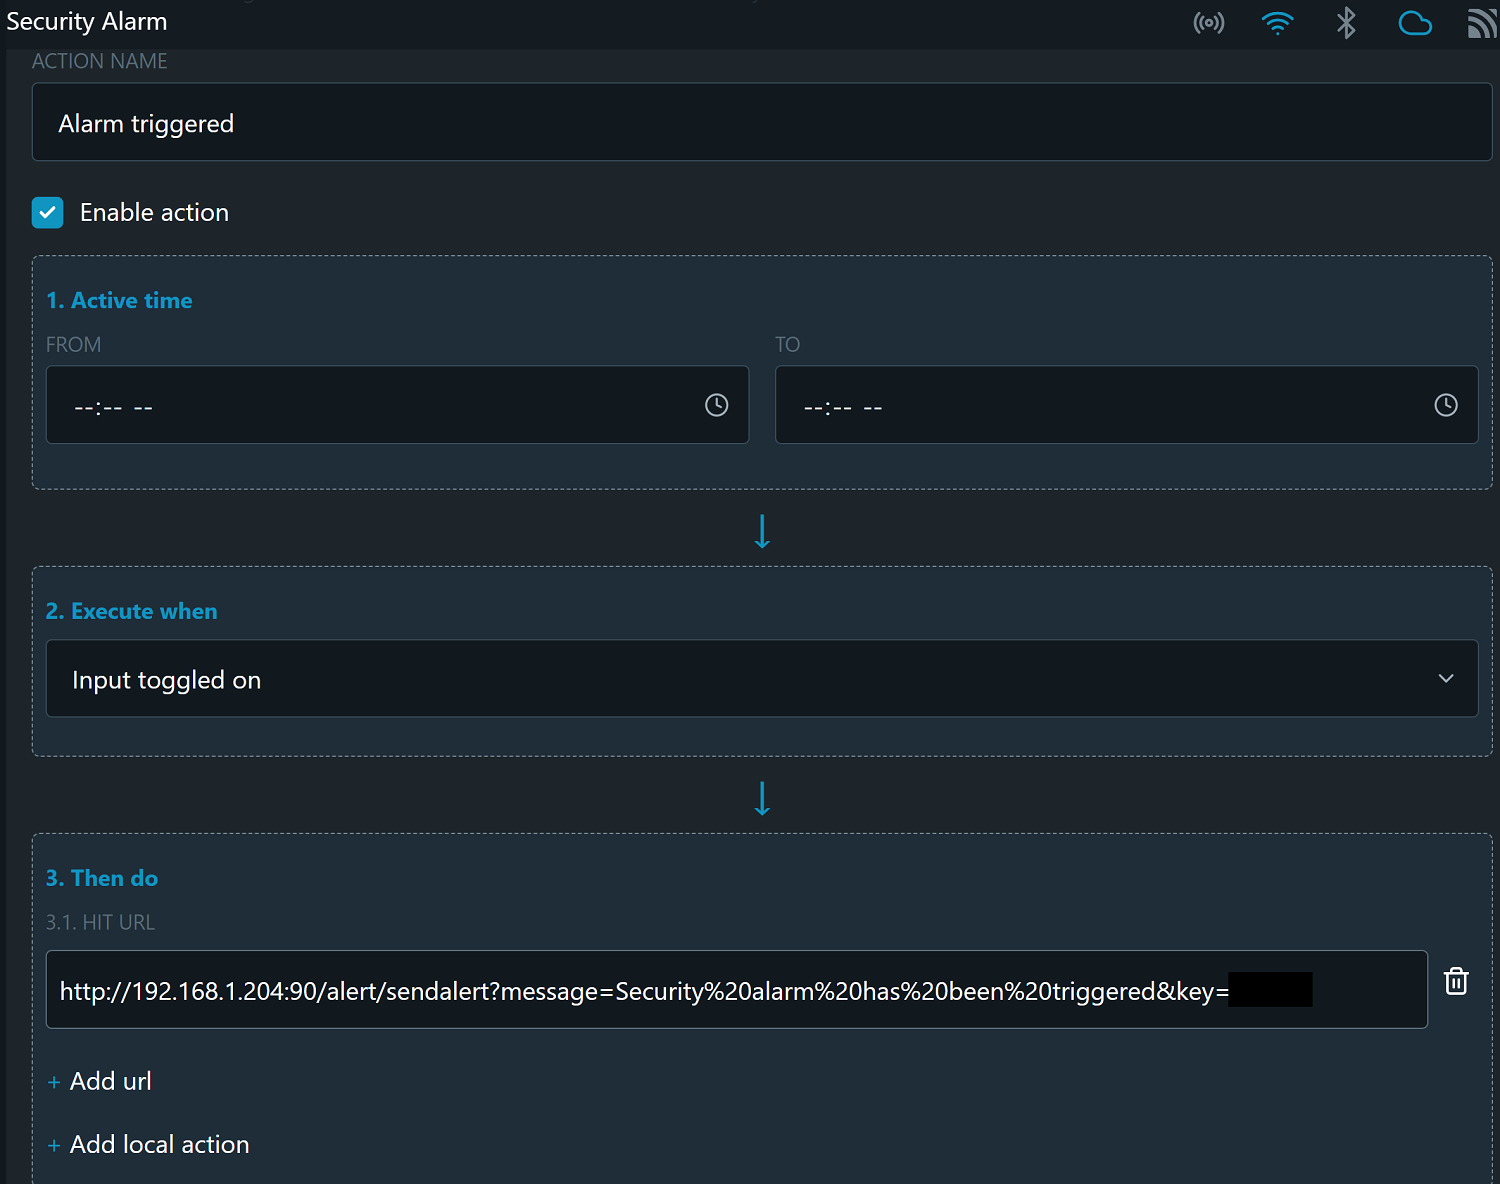
Hint: the deactivate alert would be triggered when the input is toggled off
Building and deploying the API
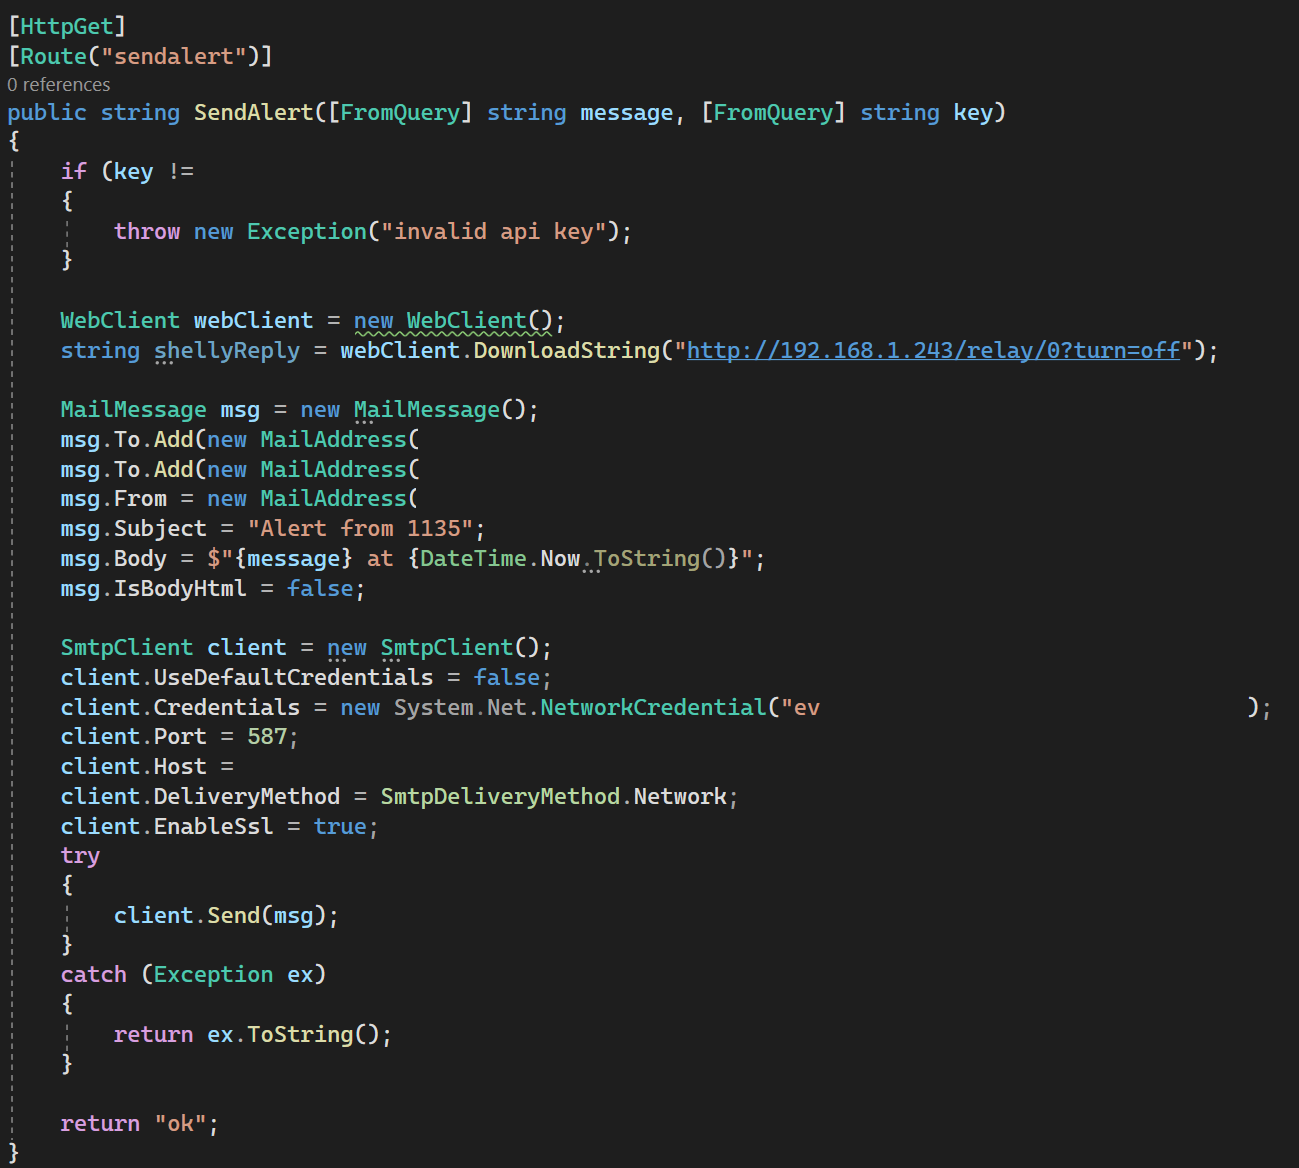
You’ll need a server to host the API you’re about to build. I would recommend using Ubuntu server as it’s very lightweight and will run on a Raspberry Pi, VM, container, or old PC. You can even deploy to the cloud. Any web API technology is fine, but I used .NET Core behind NGINX on an Ubuntu Server container hosted in Proxmox. Finally, you’ll need an SMTP relay or SMS gateway to call to actually send the alerts. Below is the small API function I wrote to handle alarm events identified by the IO relay. You’ll notice I added some very rudimentary security to stop anyone with access to my WIFI network from messing around. There’s also a step instructing the relay to disconnect the phone line when an alarm is triggered. The reason for this is if the system is wired to a real landline it will dial over and over attempting to reach a monitoring center. If you’re using a tone generator this step isn’t needed.
Conclusion
Thanks for reading! I know this is very high level, but I made the assumption that anyone interested in doing this is fairly technical. If you have any questions, comments, or ideas to expand on this and make it better please reach out. I’ve had this set up for over a month now, and it has worked very well.