Use popular, well-supported technologies like .NET, C#, ASP.NET MVC, and SQL without paying vendors a dime. If it doesn’t work out you can easily switch to paid platforms and tools. See an example of this stack out on botswarm.io
Why would I want to do this? Using this stack and tool suite gives you the support and benefits of C# and .NET without the vendor-lock and many licensing fees for tools, operating systems, and servers. The best part is, you can seamlessly switch over to Windows development and hosting if you end up finding something you don’t like.
Why not use .NET Core and VS Code? Both are great respective frameworks and IDEs, but .NET Core lacks much of the functionality of full .NET. For example, the other day I was trying to write a simple IOC container for .NET Core and wanted to invoke GetExecutingAssembly. No dice – that handy function doesn’t exist in .NET Core, along with many others. Additionally, VS Code is a very cool IDE, but it’s not there yet from an enterprise perspective, and maybe never will be since that’s probably not its purpose. One stark example is the debugging features and experience between VS Code and a full IDE like Visual Studio Community or MonoDevelop.
What exactly is new here? Nothing! I’m not inventing anything, rather showing you a great technology stack and tool suite that can be used reliably from development, to deployment, to hosting for projects of any size, importance, or complexity. This is all based on my own trial and error over the course of several years.
This writeup assumes that you’re a whiz .NET developer and general tech guru. Some things I’ll go through quickly, as they are intuitive to set up or there is already a lot of support available on the Internet. With any setup like this you’ll inevitably run into snags. Just post below and I can help you out. I’ll be sure to update this as people point out things that need to be clarified or fixed. One more thing – we’ll be building and hosting a web app below, but this stack can also be used to host .NET services and processes, and other APIs.
PART 1 – Dev Machines
Let’s start with what a development machine looks like:
Hardware: The best and fastest you can afford 🙂
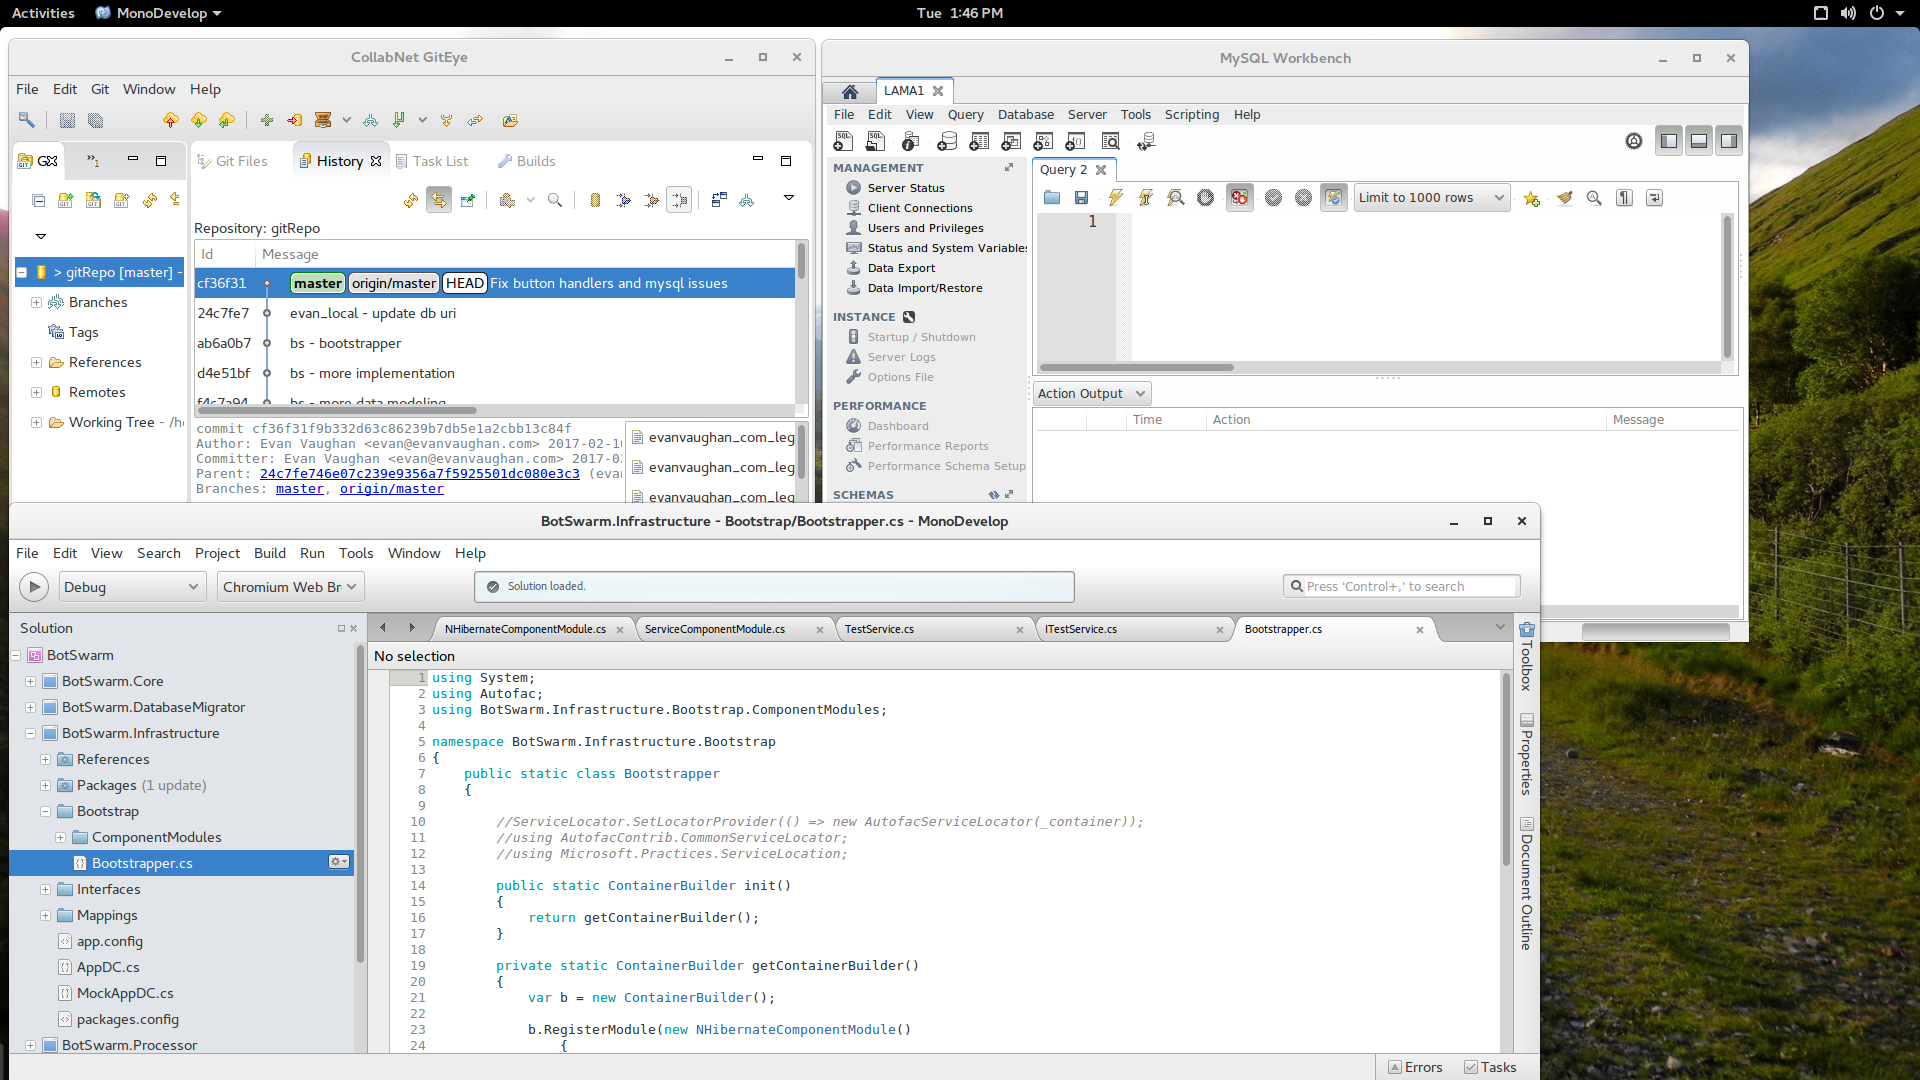
Software: Ubuntu Gnome (or you favorite flavor of Linux), GitEye, MonoDevelop IDE, MySQL Workbench, Putty. Cost: $0
There is a lot of support for installing and configuring the above operating system and tools, so I don’t need to go into too much detail here. This is what my dev machine looks like:
Ok, so your dev machine is all set up. Let’s write, well create, some code! Open up MonoDevelop and got to File – New – Solution, and pick an ASP.NET MVC Razor Project with Unit Tests. MonoDevelop will scaffold out a nice solution for you. Now, if you’re missing the option for that project, you may need to install some additional packages. Ample help is available online, and you can also post below for help.

You should now be able to hit “play” and start up the app. I modified mine a bit…

Keep in mind, this is a full featured IDE and .NET framework (mostly). You can install nuGet packages, Entity Framework, anything. I’m running some extremely complex apps on this stack. And the best part is, you can immediately pop over to Windows and open your app in Visual Studio if you decide this isn’t for you.
PART 2 – Source Control (and VM Host Setup)
Alright, that was fun and hopefully not too difficult. Now we need to commit our code somewhere, and we need to host our cool app, and our app will probably need a database as we build it out. So let’s set up some servers.
Host machine hardware: You probably want at least an I5 with 8GB RAM and 500 GB or storage
Server software: Ubuntu Gnome host running VirtualBox hosting an Ubuntu Server Git, MySQL, and Apache with ModMono Instance. Cost: $0
I’m assuming you have some kind of host machine available, so grab that and install an instance of desktop Ubuntu on it, then download VirtualBox and we’ll build out 3 machines. You’ll want to bridge the 3 VMs in VirtualBox so they can see your network, and you probably want to set your DHCP to assign static IPs to their virtual hardware addresses.
Let’s start by building the git server so we can commit the code we just wrote:
VM-Git instance: Ubuntu 32-bit, 256MB RAM, 8GB HD (these are just suggested names and specs)
Download an mount the Ubuntu Server image, and install it on this VM with the default options. Check option to install SSH Server. Once the server is set up, terminal into it using Putty or other SSH client:
Set up Git:
sudo apt-get install git

git config --global user.email "you@example.com"

git config --global user.name "Your Name"

git init --bare /path/to/repository
Now you can add/clone your repository in GitEye: username@hostname:/path/to/repository
You should now be able to commit your code, and you’re good to go on the development side. You can spin up more dev stations and add resources to your Git instance, and be a 500 developer team in no time. Lets move on to hosting!
PART 3 – Hosting
VM-Web01 instance: Ubuntu 32-bit, 256MB RAM, 8GB HD
Same thing as earlier – set up Ubuntu server, this time you’ll want to opt for Apache and SSH Server. Once set up, terminal into the server. We have a little work to do this time!
– Install and enable mod-mono plugin:
sudo apt-get install libapache2-mod-mono mono-apache-server4

mono-apache-server2

Enable mod-mono mod
– Create a directory for your app, and set it’s permissions:
sudo mkdir /var/www/myapp

sudo chown -R www-data:www-data /var/www/myapp
– Create a server config file for the app – save it in etc/apache2/sites-available:
<VirtualHost *:80>
ServerAdmin webmaster@localhost
ServerName myapp.mono
MonoAutoApplication disabled
AddHandler mono .aspx ascx .asax .ashx .config .cs .asmx .axd
MonoApplications “/:/var/www/myapp”
MonoServerPath default /usr/bin/mod-mono-server2
DocumentRoot /var/www/myapp
<Directory />
Options FollowSymLinks
AllowOverride None
</Directory>
<Directory /var/www/myapp>
Options Indexes FollowSymLinks MultiViews
AllowOverride All
Order allow,deny
allow from all
SetHandler mono
DirectoryIndex index.aspx index.html
</Directory>
ErrorLog /var/log/apache2/error.log
# Possible values include: debug, info, notice, warn, error, crit,
# alert, emerg.
LogLevel warn
CustomLog /var/log/apache2/access.log combined
</VirtualHost>
A few more things – You’ll want to add necessary ports to ports.conf, depending on the port you want to use to host the app
sudo apt-get install mono-complete (to install the Mono runtime)
Finally, enable the site and restart Apache:
sudo a2ensite myapp

sudo /etc/init.d/apache2 restart
You can test your Apache instance by navigating to the IP address of the server in a browser. Now you’re ready to deploy – for now we can simply copy the files from your project folder in MonoDevelop to your Apache web folder. You’ll probably want to set up samba so you can easily deploy to your app folder over the network. In the future you could can set up a CI and deployment framework that we either write ourselves, or use one of the many existing open source ones.
PART 4 – Database
This is getting crazy, but it’s also really cool. Let’s spin up a MySQL instance that our app can use:
VM-MySQL Instance: Ubuntu 32-bit, 256MB RAM, 8GB HD
Again, install Ubuntu Server with default options. Check option to install SSH Server. Terminal into server:
– Install MYSQL:
sudo apt-get install mysql-server
– Allow access to network hosts:
vim /etc/mysql/my.cnf – Comment out bind-address
– Restart
service mysql restart
– Allow access from all machines (or a set) — Open MySql shell:
mysql -u root -p

GRANT ALL PRIVILEGES ON *.* TO 'USERNAME'@'%' IDENTIFIED BY 'PASSWORD' WITH GRANT OPTION;

flush privileges;
– Add and configure app account
CREATE USER 'newuser'@'localhost' IDENTIFIED BY 'password';

GRANT ALL PRIVILEGES ON * . * TO 'newuser'@'%';

FLUSH PRIVILEGES;
You can now fire up MySQL Workbench and connect to and easily work with your DB. It’s one of the best DB management suites around, and it’s free! Connecting your ASP.NET app to the DB is pretty straightforward – you’ll need to reference in the MySqlConnector library, and you can then use ADO.NET or your favorite ORM like EF, Dapper, or nHibernate to interact with MySQL.
PART 5 – Tips
- To scale out your app, you simply need to clone instances of your Apache server in VirtualBox. (And set up a load balancer)
- You can set up a nightly script to shut down and backup your VMs
- Use an ORM in your app and use your database only for data storage (no triggers, SPs, etc). That will allow you to easily switch to another database if you ever want to
So there you have it, a full enterprise stack using well-known technologies like .NET, C#, and SQL, and it won’t cost you a penny. And if you do want to start giving people your money it’s easy to make the switch. You can check out one of my sites hosted on this stack here. It’s an older site using ASP.NET WebForms and VB.NET, and I actually moved it over to Apache and MySQL from IIS and SQL Server. In the near future I have a couple large MVC and MVVM apps I will be deploying to prod, using the stack and tooling described in this post.